


Table of contents
Photo by Souvik Banerjee on Unsplash
Why AWS ?
The Benefits of WordPress Hosting
Scalability and Performance
High Availability and Fault Tolerance
Security and Compliance Made Easy
Easy Deployment and Management with AWS WordPress Hosting
Cost-Effectiveness at its Best AWS WordPress Hosting Pricing
Global Content Delivery for WordPress: AWS CloudFront Integration
Elevate Your Website with AWS WordPress Hosting
Seamlessly Scale Your WordPress Site with AWS
Uninterrupted Access: The High Availability of AWS WordPress Hosting
Let’s get check How to host the website on AWS !
- Login to your AWS Account
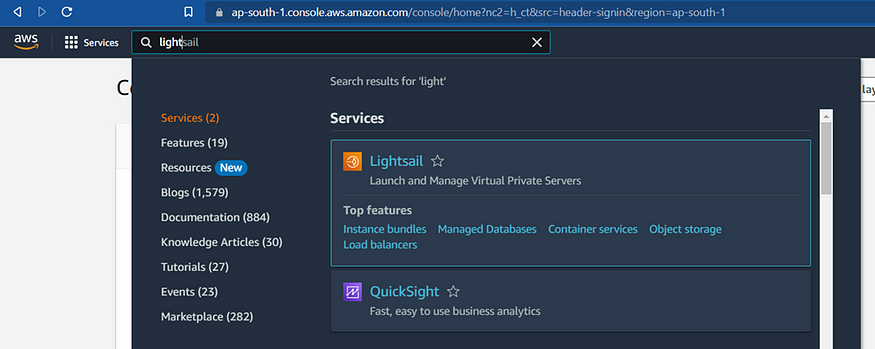
2. Search LightSail in search bar like below and Open
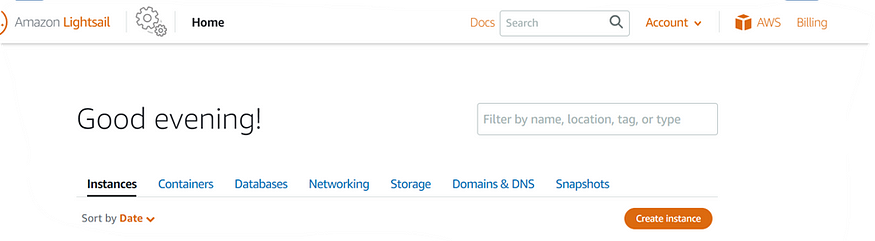
3. In Instance click Create Instance
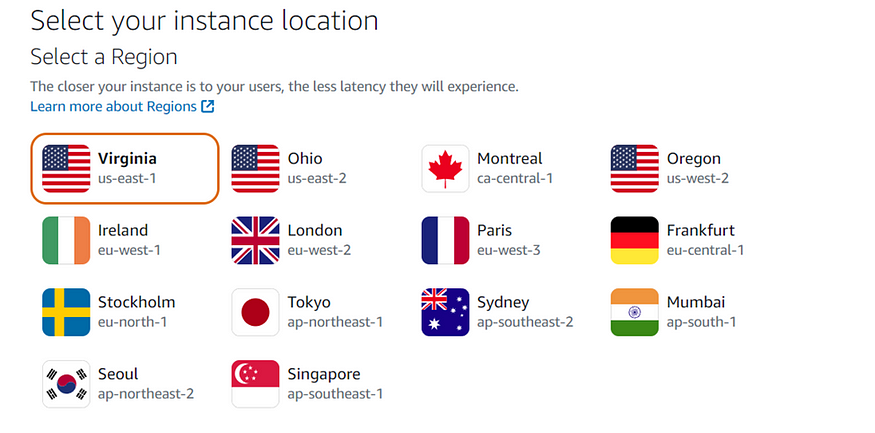
4. Now Select your Instance Location
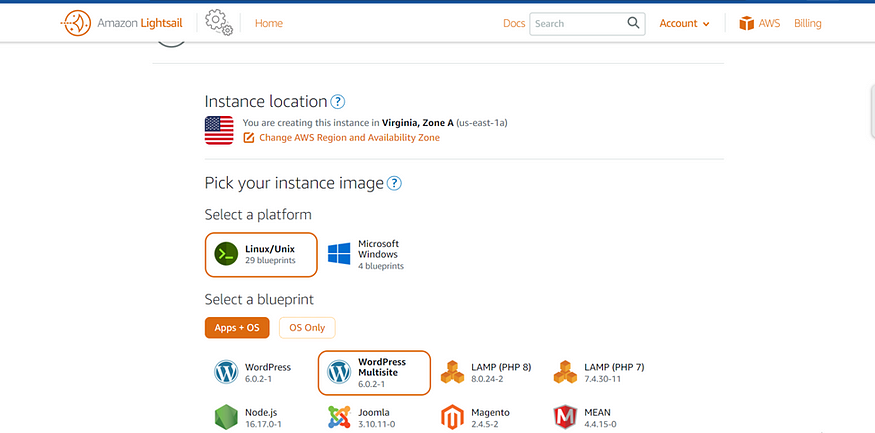
5. Select Platform as Linux /Unix and Select a blueprint App+OS
6. Now click the server type
i. If you need to host single website only, choose WordPress
ii. If you want host a 2 or more websites, choose WordPress Multisite
7. Now scroll down click create a new the SSH key and enter the key name and then click save. Download and save the key in secure location.
8. Now choose your instance Plan as per your needs.
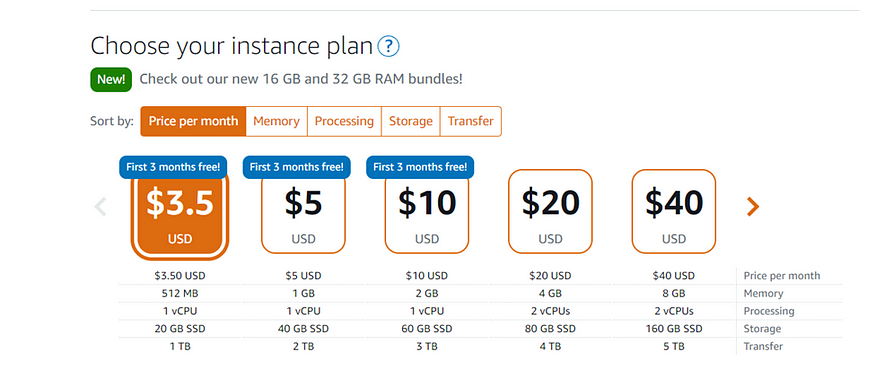
If your running website for only static content — choose 512MB,1 vCPU, 20 GB SSD- Basic plan
Running Dynamic contents and blogging more traffic — choose 1GB ,1 vCPU, 40 GB SSD — Recommended
Running Multiple websites and WooCommerce, Blogging — Choose 2GB, 1vCPU, 60GB SSD — Most Recommended
Note: If you don’t know how to select?, calculate the traffic for your websites, and how much size of the storage you need.
9. Now select the how many servers you need create
Identify your instance x 1
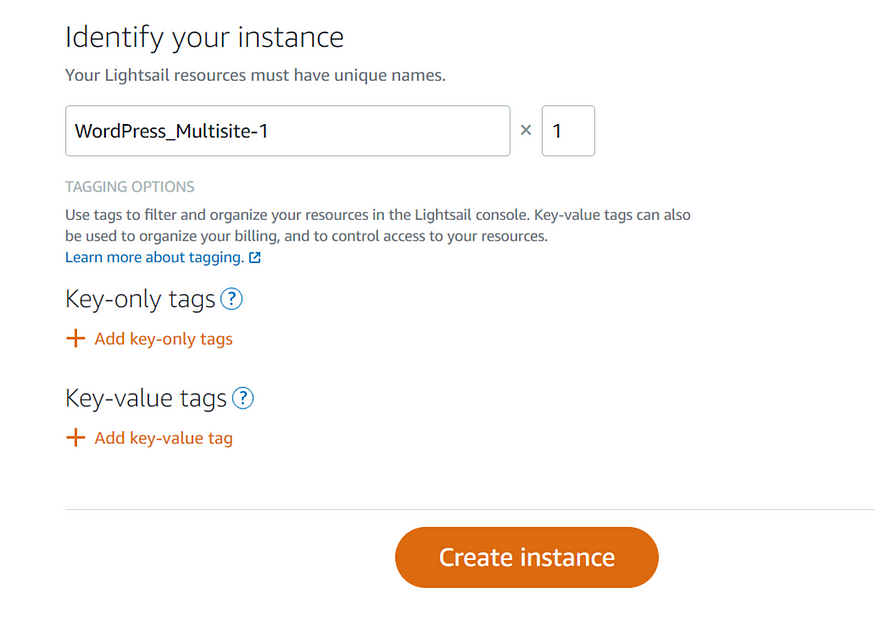
10. Now click create instance.
Wait for a min, Server will create.
11. Once instance created you can see in instance Tab it will show your server details.
12. Now open the server and you can see the IP address.
13. Copy the IP address and paste in your browser and you can see the Sample page.
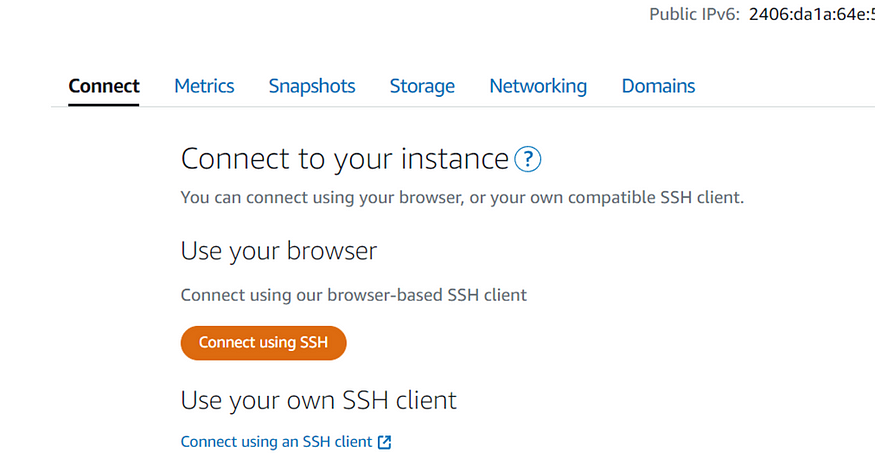
14. For WordPress admin password Click on connect tab
And click the connect using SSH
15. Once connected type below command in Terminal like below and hit Enter.
cat bitnami_credentials
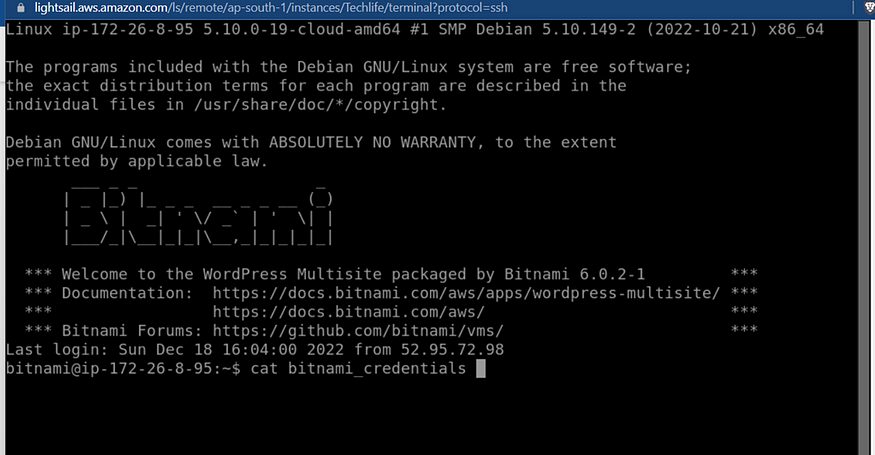
Now you can see the credential. User and password
16. Next you can go to WordPress admin page and login using the above credentials.
http://IP-address/wp-admin/ or http://url/wp-login.php
Thanks for the time! Follow for more 👍
If any queries write for me via below. Glad to help you.
Stay Connected and collaborate ⬇️
Medium - karthidkk123.medium.comLinkedIn - linkedin.com/in/karthick-dkk